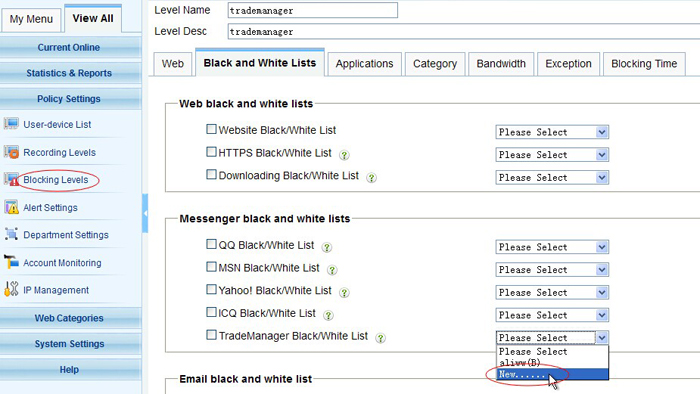
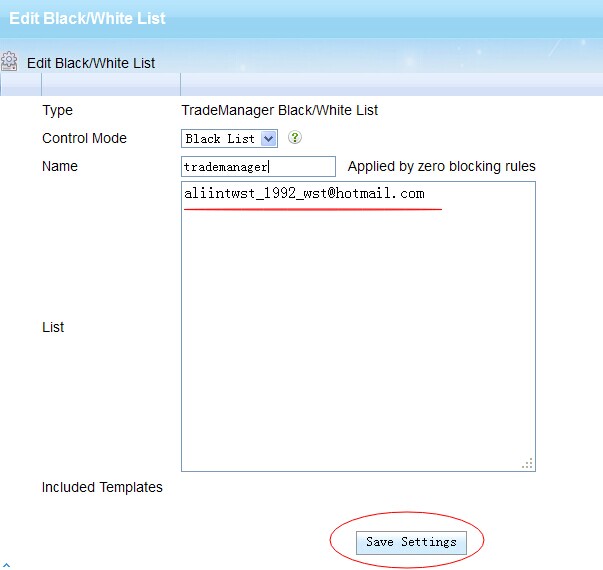
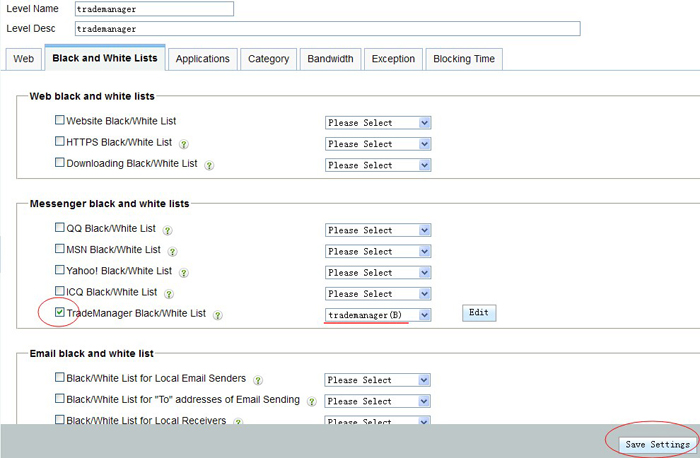
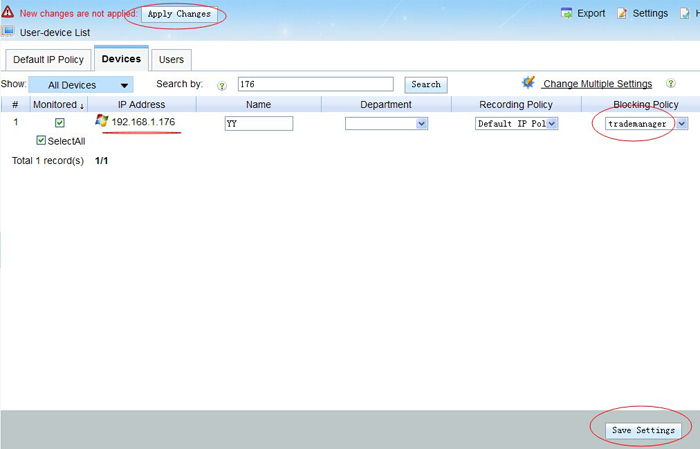
1. Download “Tor” protocol in “System Settings -> Protocols -> Download Protocols”
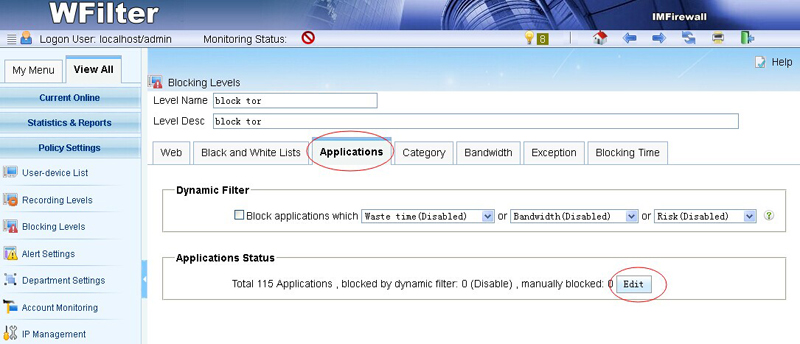
2. Add a “block tor” policy.
3. Apply “block tor” policy.
4. Tor can be blocked.
1. Download “Tor” protocol in “System Settings -> Protocols -> Download Protocols”
2. Add a “block tor” policy.
3. Apply “block tor” policy.
4. Tor can be blocked.
In WFilter 4.1 version,a new feature named “web content pushing” is added. This feature enables you to push a web page to client devices at a time interval. You can define time interval, triggers for pushing and pushing pages.
In this example, I will guide you to use the “web content pushing”in WFilter 4.1.
1.1New a blocking level
Add a “company broadcast” policy in “Policy Settings”->”Blocking Level Settings”. Check “Enable Web Content Pushing” and click “New”.
Add a new “web content pushing” named “broadcast”, in “Triggers”, input “www.baidu.com” which means this web pushing shall be triggered when baidu.com is visited.
In “Content”, you can put anything you want to broadcast. It will be displayed when triggered.
Apply this blocking policy to target ip ranges.
1.2 When an user visits baidu.com, the broadcast message will show up every ten minutes.
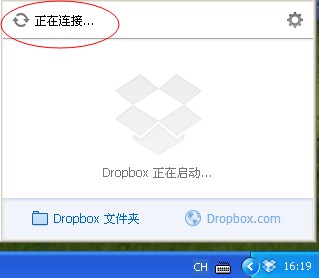
From version 1.0.172, WFilter free is able to block dropbox on network. In this guide, I will demonstrate you to block dropbox with WFilter free edition.
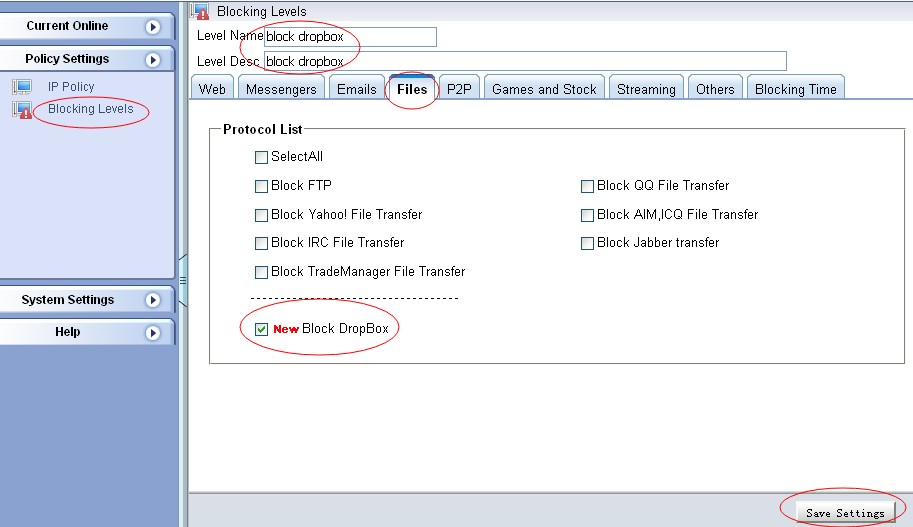
New a “block dropbox” policy in “Policy Settings”->”Blocking Level Settings”.
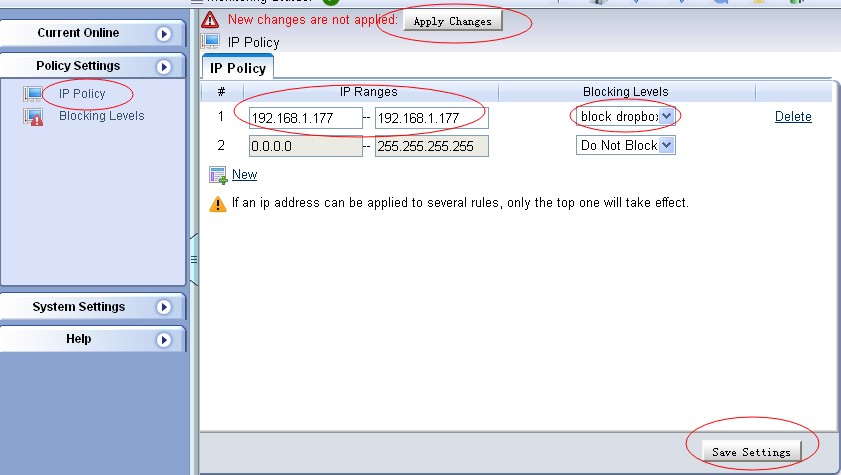
Apply the “block utorrent” policy to client ip ranges in “User-device List”.
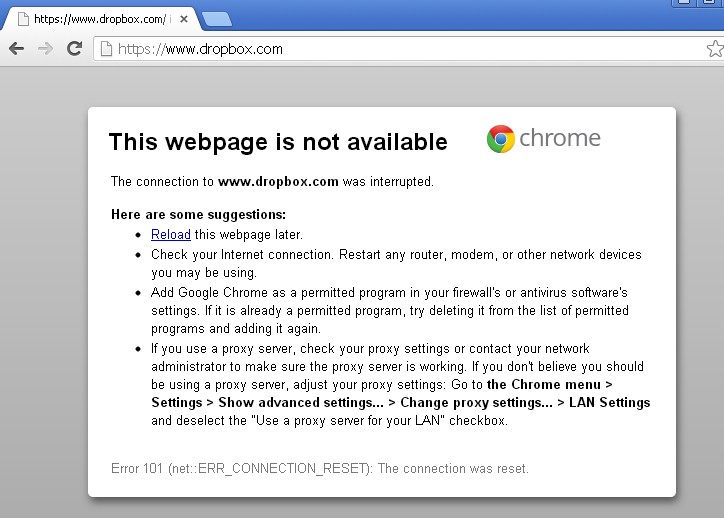
Can’t connect to dropbox server and website.
According to our recent performance tests, WFilter 4.1 performance is improved significantly. The new version can handle 5000 monitored clients easily, using a “Intel Celeron E3200@2.4GHZ” CPU and 2G RAM.
The monitored clients number still can be increased if it’s running in a better hardware computer.
From version 4.1, WFilter is able to block bittorrent traffic on network. Various bittorrent clients are supported, including utorrent. In this guide, I will demonstrate you to block utorrent downloading with WFilter 4.1, Web Filter Software.
Please Notice: in pass-by filtering mode, you need to block udp ports 1024-65534 in your router or firewall for complete blocking of utorrent.
Below are the steps to block utorrent in WFilter, if you haven’t deployed WFilter successfully, please check “WFilter Deployment Guide”.
New a “block utorrent” policy in “Policy Settings”->”Blocking Level Settings”.
Apply the “block utorrent” policy to client ip ranges in “User-device List”.
Utorrent download speed will be zero when blocked.
In WFilter’s blocking history logs, you will be able to see blocking events of utorrent .
Usually, a manageable switch or router with “port mirroring” feature is required for correct WFilter deployment. In case you only have a wireless router which does not support “port mirroring”, you can try this solution, which is simple to deployment.
The point is to “configure the WFilter PC as your internet gateway and turn the wireless router into a wireless AP.”
The network topology diagram:
The first step is to make the WFilter PC acting as your internet gateway. The WFilter PC shall have two network adapters, one for internet access( usually connected to an ADSL modem), another one for local subnet(shall be configured as “obtain ip address automatically).
We use Win7 in this example. And you’re supposed to have setup internet connection in one network adapter.
Click “Sharing” in “Properties” of the adapter which is connected to internet in “Control Panel”->“Network and Internet”->“Network Connections”, and choose “Allow other network users to connect through this computer’s internet connection”. (Figure1)
Now, another adapter(“LAN Connection”) will be assigned the ip address 192.168.137.1 (It will be 192.168.0.1 in windows XP).
This 192.168.137.1 is the default gateway for local subnet devices to access internet. To make it work for wireless devices, you also need to modify your wireless router’s settings.
Because the WFilter PC is sharing its internet, we only need the wireless router to act as a wireless AP.
Please leave the WAN interface dis-connected, and connect the “LAN Connection” adapter of the WFilter PC to a LAN interface of your wireless router(Can be every LAN interface, usually connect to LAN1).
Assign ip address “192.168.137.2” to the lan interface. If the WFilter computer is windows XP, the ip address shall be “192.168.0.2”.
Because the WFilter PC is serving DHCP, now you need to turn off the dhcp service of the wireless router to avoid conflicting.
The last step is to configure the “LAN Connection” adapter as the monitoring adapter in “Monitoring Settings” of WFilter. And you’re able to monitor and filter local network users.
DHCP servers are commonly used for automatic ip address assigning of client devices. However, if there are multiple DHCP Servers available in one network unintended, it will lead to IP addresses confusion or conflict.
Using the “DHCP Discover” plugin of WFilter. You can get a list of running dhcp servers on your network by a single click.
In this example, I will guide you to use the “DHCP Discover” plugin of WFilter Free.
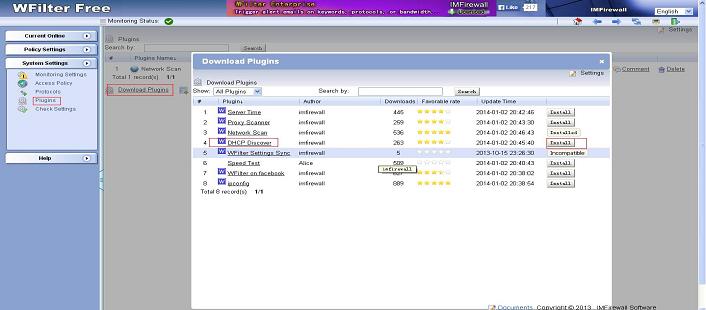
Click “Download Plugins” in “System Settings”->”Plugins”. Find the “DHCP Discover plugin” and install it.
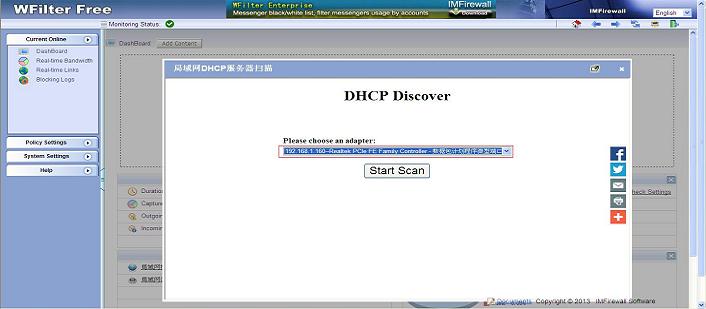
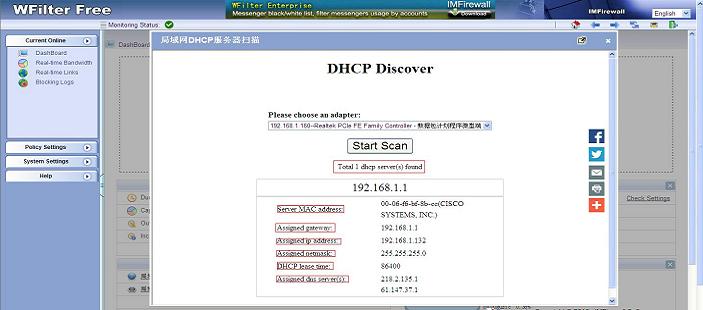
Firstly, You should choose an adapter and then “Start Scan”.
When the scan finished, you’ll get a list of running DHCP server(s) and certain informations.
Using the “Network Scan” plugin of WFilter. Not only you can scan online list of devices, device type, os, IP and MAC address, you also can get a list of open ports of each device.
In this example, I will guide you to use the “Network Scan” plugin of WFilter Free
Click “Download Plugins” in “System Settings”->”Plugins”. Find the “Network Scan plugin” and install it.
You can choose “Local Subnet Computers” for a local subnet scan. The maximum “Threads” number is related to your hardware capability.
When the scan finished, you’ll get a full list of online devices, together with ip address, MAC address and manufacturer, os type, ping value, netbios and open ports. Andriod phone and iphone can also be detected.
You also can input ip address to scan a target ip range.
Finally, WFilter 4.1 version is coming to the beta testing after two years of development. Now let me show you the exciting new features in this new version.
More deployment solutions are added, especially for wifi networks. We also added solutions to monitor by mac address in multiple segments networks. In WFilter 4.0 version, only “by ip address” mode is supported, the new version will retrieve mac address information from your core switch via SNMP.
Added support for ip protocols and ip fragment. For web monitoring, WFilter new version will record browser type(userAgent) as well.
We adopted fastcgi technology in the new 4.1 version, which makes great improvement on UI loading speed. Monitoring performance is also improved.
Added “common” menu for you to define common used menus, so you can open a page within one click.
We also re-designed the “online computers” page.
With this “protocols” system, you can download and share protocols within a few clicks. You will never have the pain to configure new protocols any more.
We integrated a set of tools for network monitoring and management, which is still growing. You can get plugins for network discovery, wfilter management and other related features.
This feature enables you to push web content without a real blocking. You can define time interval, web push triggers for this content to appear regular in client computers.
With the last version, it’s easier to assign policy for new detected devices, and set default OU policy for new detected AD users.
New version downloading URL: WFilter 4.1
Please notice: WFilter 4.1 version is still in beta testing, and some features are not fully tested. This version is only for preview and testing purpose. So if you already have a stable WFilter 4.0 running, it’s not wise to replace it with this beta version.
This document decribes a new deployment of WFilter in a wireless network. The solution is to turn the wfilter computer into a wifi hotspot. So wfilter can monitor wifi clients using this hotspot.
Please notice: this solution uses the wireless adapter of the wfilter computer to share internet connections, its wifi signal might not be so strong as your wireless router.
Please check below steps to creating wi-fi hotspot in win8 enterprise. The detailed steps might be different in other windows versions.
1). This desktop has a wireless adapter.
2). Run “cmd” as Administrator. Enter the following command:
netsh wlan set hostednetwork mode=allow ssid=Test key=password
This command in below figure will create a wireless access-point with SSID of “Test” , key of “12345678″. You can modify the “ssid” and “key” as you want.
3). Run the following command to start wifi hotspot.
netsh wlan start hostednetwork
4). Now you will see a new microsoft hosted network virtual adapter.
5). Open your wifi’s property to enable internet connection sharing to the virtual adapter.
Now you shall be able to see the new wifi hotspot in mobile devices. Clients using this hotspot can be monitored by wfilter.
There are several other ways to create a wifi hotspot, you may do it in a way you like.
1). Run “Configuration Wizard” in “Help” of WFilter
2). Choose “pass-by mode”, set the wireless adapter as the “monitoring adapter” and “blocking adapter”, check “this adapter is wireless”.
3). Next until finish. Now you’re able to monitor connected wifi clients.