Monthly Archives: April 2017

How to deploy a passby internet content filter with your cisco switch?

You don’t need to buy a expensive firewall or UTM appliance to do internet content filtering and usage monitoring.
In this post, I will guide you to deploy a passby internet content filter simply with a cisco switch.

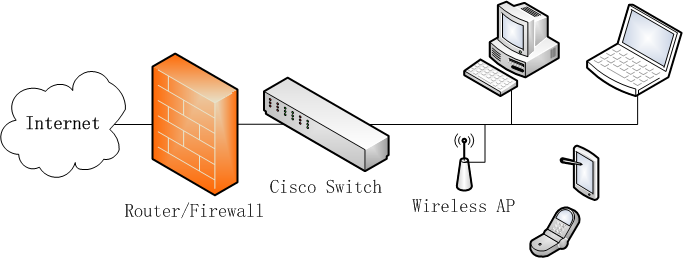
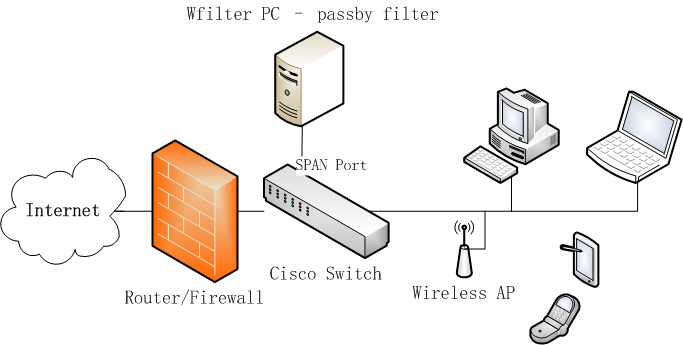
First, suppose you have a cisco switch with below network diagram.
cisco1


Most cisco switch supports “port mirroring(SPAN)” feature. You may use below commands to enable it:

1. Set source port

Switch(config)#monitor session 1 source interface Fa0/23

2. Set target port

Switch(config)#monitor session 1 destination interface Fa0/22 ingress vlan 1

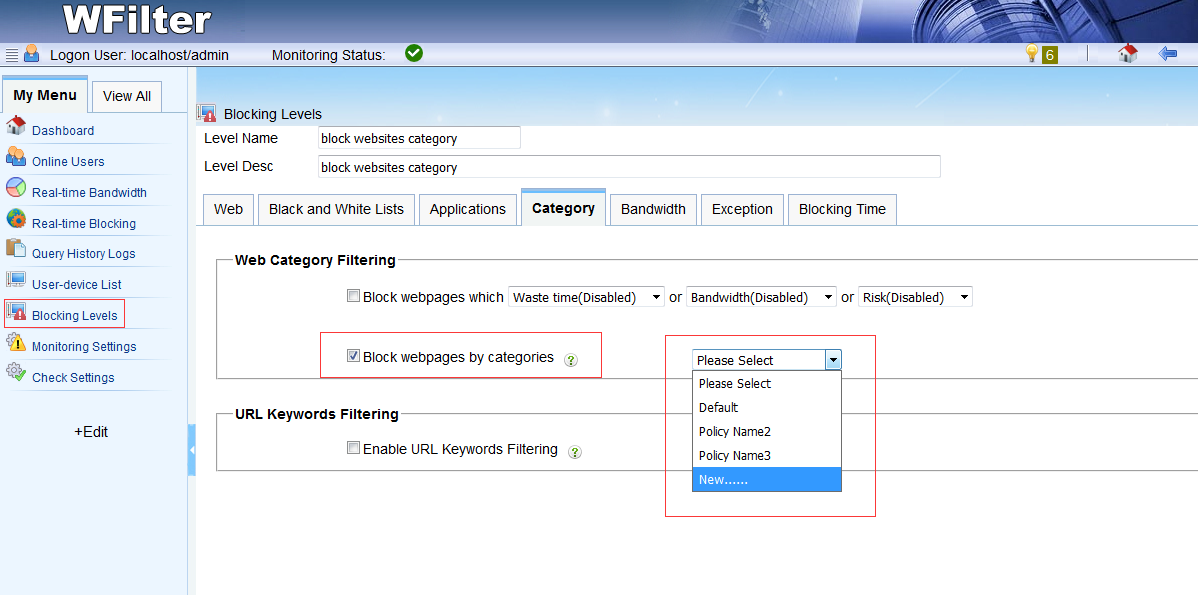
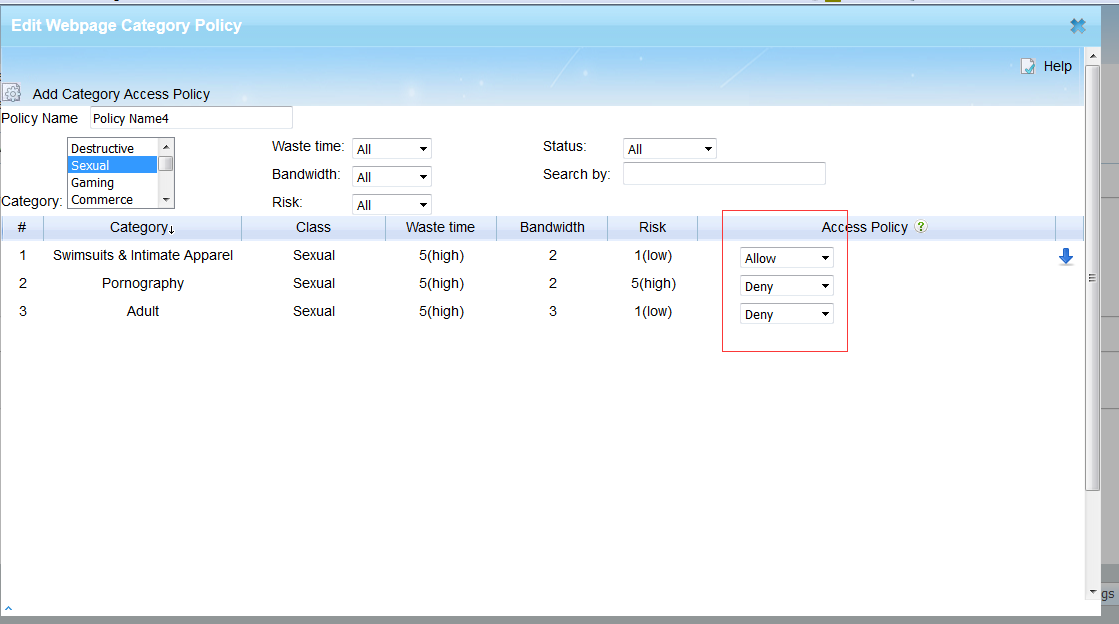
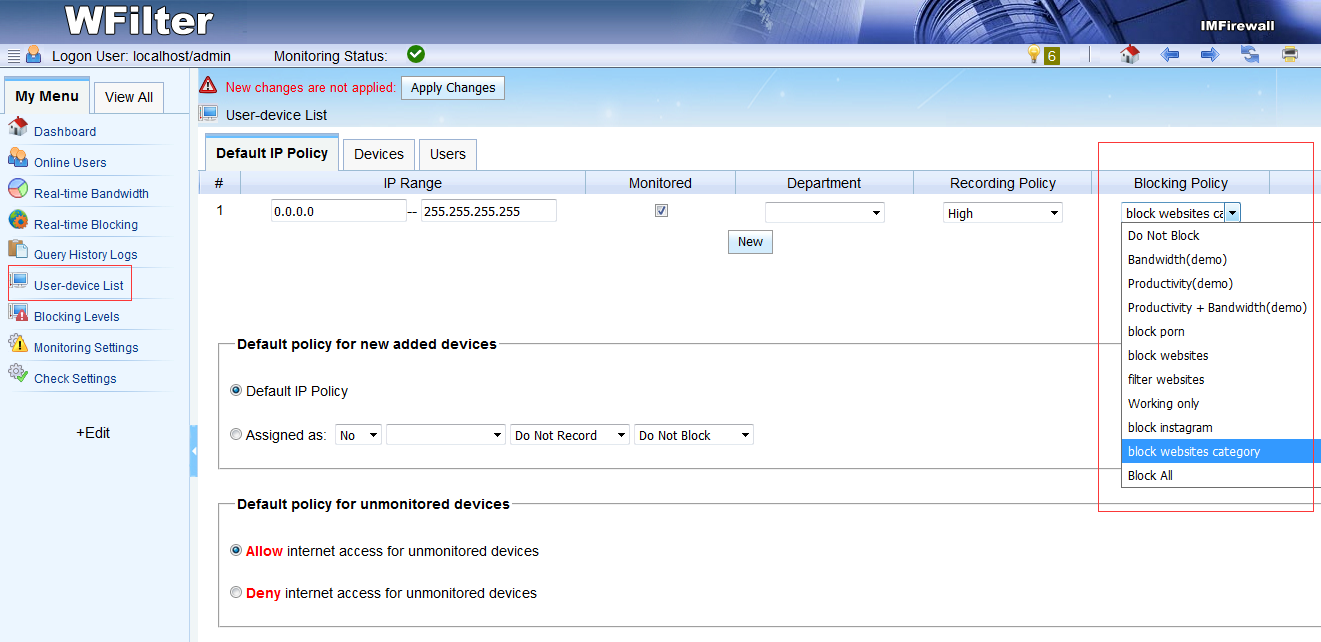
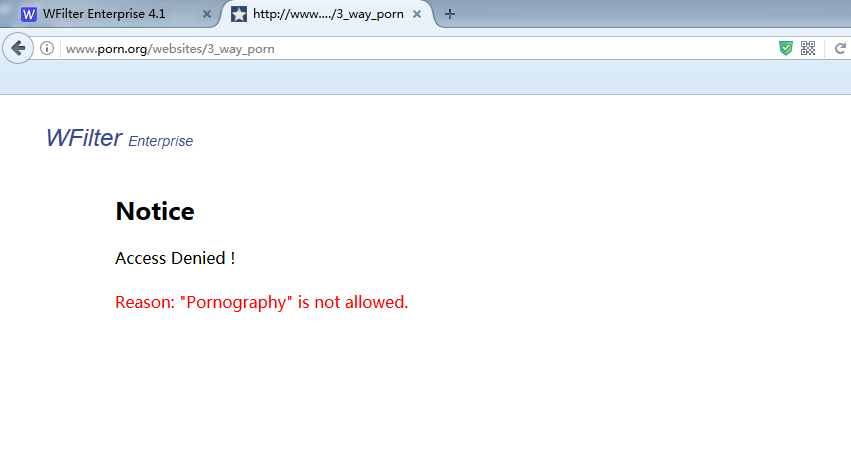
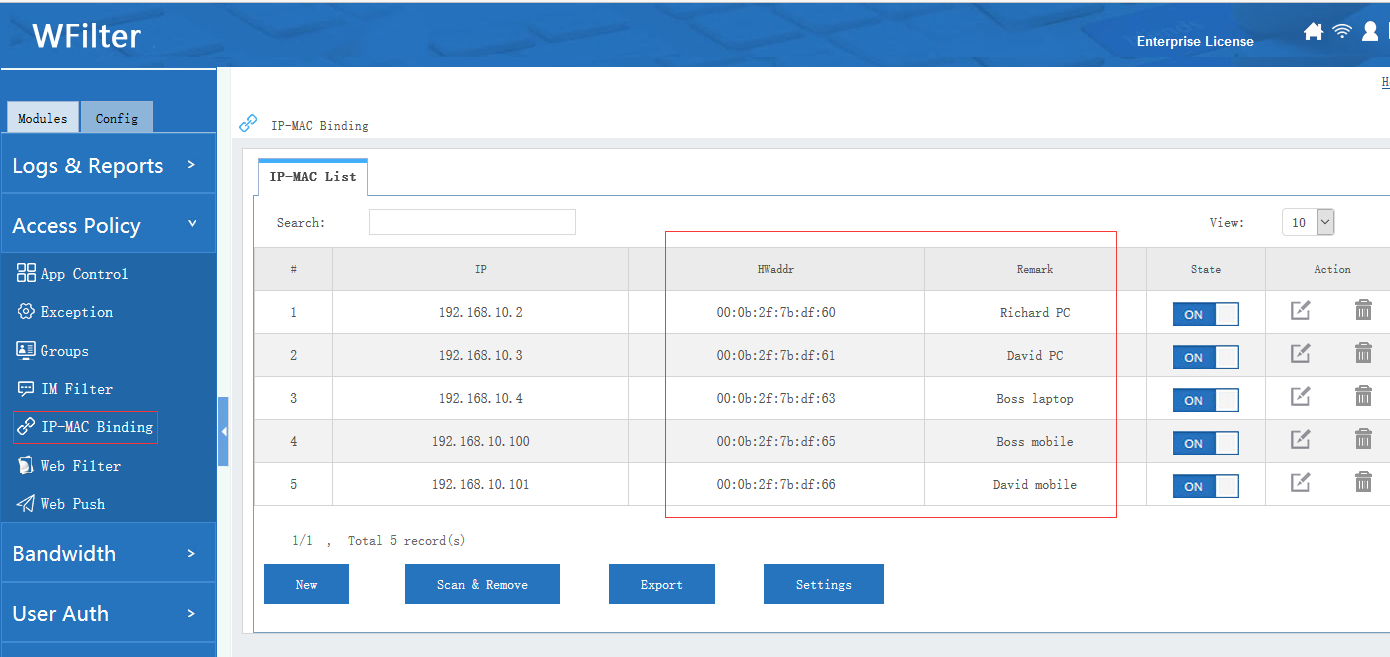
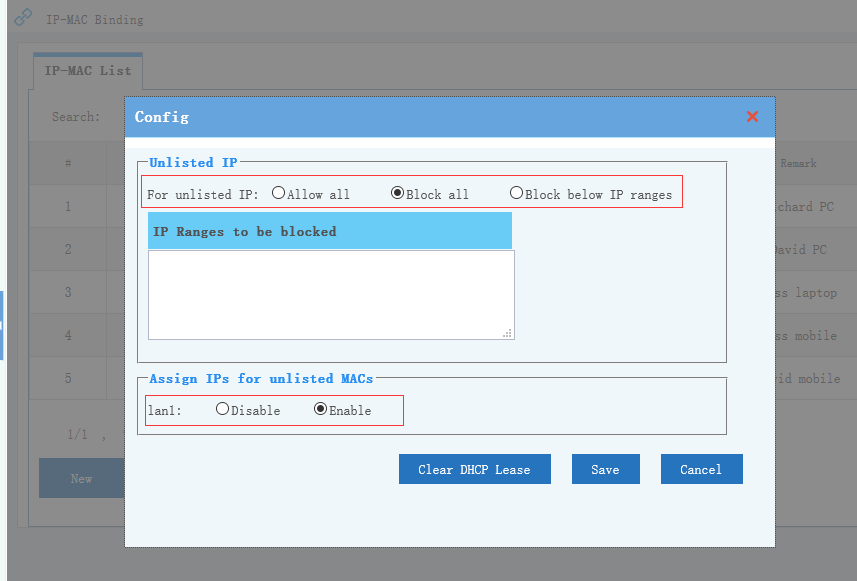
Then, you need to install a passby filtering program(ie: WFilter internet content filter) in a windows PC, and connect this PC to the “target port”. So you can monitor and filter internet access of network clients. Please note: “ingress” must be enabled for filtering to work.

The new diagram:

cisco2

Pass-by filtering can also be as powerful as a pass-through UTM device, except for bandwidth rate limiting. For more information, please check: WFilter deployment.

How to block website category in WFilter ICF?

This post will demonstrate the steps to block website categories of network clients, with WFilter internet content filter(WFilter ICF 4.1).

WFilter contains an integrated URL database, which includes about 60 website categories. With website category filtering features, you can block certain categories by a few clicks. This website category filtering feature is also available in WFilter NG firewall.

1. Add a new blocking policy

New a blocking policy in “Policy Settings”->”Blocking Levels”. In “Category”, you need to check “Block webpages by categories”. Then click “New…” in the dropdown list.

filter_category01

2. Block certain categories.

To block a website category, you simply need to set “Access Policy” to “Deny” . In this example, we set “Sexual” sites to “Deny”.

filter_category02

3. Apply this blocking policy.

In “user-device list”, set default “blocking policy” to the new added “block websites category” policy. So all network clients will be blocked.

filter_category03

4. Check the blocking.

filter_category04

How to bind ip address with mac address in network?

IP and MAC address binding is usually configured in network switch or router(gateway). An effective IP-MAC binding solution needs to:
1. Be able to integrate with the DHCP server to assign static IPs to clients.
2. Have option to block or allow internet for un-bound devices.
3. Be able to do IP-MAC binding in multi-subnet networks.

In this post, I will demonstrate the “IP-MAC binding” feature in WFilter NG firewall. For IP-MAC binding in “WFilter internet content filter”, please check: “WFilter IP-MAC binding solution“.

1. IP-MAC Binding List

You can define the IP-MAC binding list in “Modules”->”Access Policy”->”IP-MAC Binding”. When listed, these devices will always be assigned with static IP addresses when using dynamic IP address.

ipbound01

2. Settings

Below options are available in the “IP-MAC binding” module:
1. For unlisted IP addresses, you can choose “Allow all”, “Block all” or “Block below IP ranges”.
2. For unlisted MAC addresses(devices), you can configure whether to assign IP address or not.

ipbound02

3. Multi-subnet IP-MAC binding solution

Your network is multi-subnet? No worry. With “MAC address detector”, WFilter NGF is able to retrieve MAC addresses from your core switch. So you can bind IP address with MAC address, even in a multi-subnet network.

Maccd00.jpg

A guide of “IP-MAC binding” in WFilter NGF can be found at: IP-MAC binding.