WFilter deployment using dlink2366


WFilter Deployment


—-Using Dlink2366


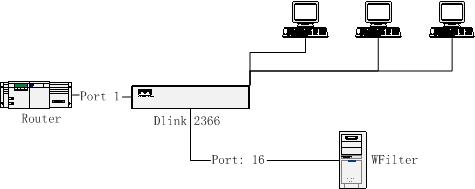
A company use a router connected to internet. A Dlink2366 as the central switch.


The network topology diagram:


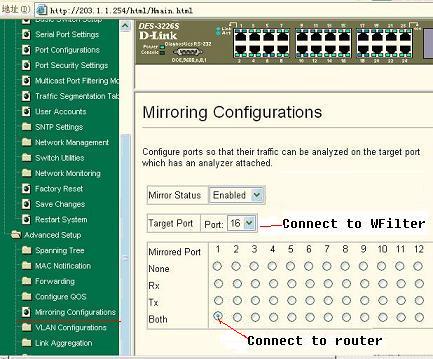
In this issue, we only need to do port mirroring in the Dlink2366 to do monitoring.


Dlink 2366 port mirror configuration:


As in the diagram above, port 16 is connected with the router and port 1 is connected to the computer with WFilter installed on.


WFilter related features:


Chat Monitor, Monitor employees, internet monitor, msn chat monitor, aim monitor, yahoo monitor, block p2p, block msn, block aim, block yahoo, block messenger, filter internet.

WFilter deployment using CISCO2950 + ISA2004

WFilter Deployment


—- CISCO2950 + ISA2004


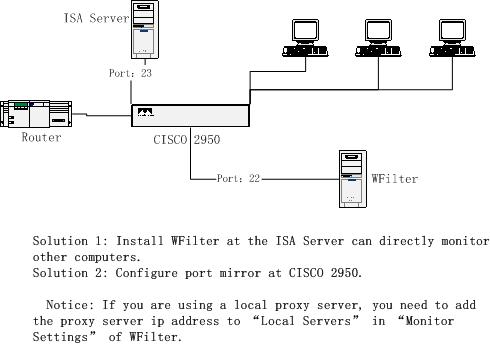
Company A use ISA server 2004 as the proxy server, a cisco 2950 switch as the central switch.


The topology diagram:


For this kind of topology, we have two solutions:


Solution 1: Install WFilter at the ISA server computer can directly monitor all computers.


Solution 2: Install WFilter at another computer and configure port mirror at cisco 2950.


Notice:  By default, WFilter only analysis traffic between local network and the internet. So if you are using a local proxy server, WFilter will not analysis the traffic between the proxy server and the client computers by default. You need to add the proxy server ip address to “Local Servers” in “Monitor Settings” of WFilter to make WFilter work.


How to configure port mirror of CISCO 2950?


As indicated in the above diagram, the ISA server is connected to port 23 of the switch and WFilter is connected to port 22. To make WFilter work, you only need to mirror port 23′s traffic to port 22.


Syntax:

monitor session session_number {destination {interface interface-id [, | -] [encapsulation {dot1q}] [ingress vlan vlan id] | remote vlan vlan-id reflector-port interface-id} | {source {interface interface-id [, | -] [both | rx | tx] | remote vlan vlan-id}}


In this example:


1. Set port 23 as the source mirror port


monitor session 1 source interface Fa0/23


2. Set port 22 as the destination port


monitor session 1 destination interface Fa0/22 ingress vlan 1

Notice: By default, the mirror port of cisco 2950 is recv-only. However, WFilter shall be able to send packages to implement block features. So in this example, we add “ingress vlan 1″ to enable send of port 22.


Some cisco switch do not support ingress syntax, if your switch does not support ingress, you can set a different “blocking adaptor”. Please follow below steps:


1. Set port 23 as the source mirror port.


monitor session 1 source interface Fa0/23


2. Set port 22 as the target mirror port(recv-only)


monitor session 1 destination interface Fa0/22


3. Add a network card in the computer with WFilter install on, connected to a normal port of the switch.


4. Change the “blocking adatpor” to the new added adaptor in “Monitor Settings” of WFilter.


WFilter related features:


Chat Monitor, Monitor employees, internet monitor, msn chat monitor, aim monitor, yahoo monitor, block p2p, block msn, block aim, block yahoo, block messenger, filter internet.

Block online streaming using WFilter

Block online streaming using WFilter


Various online streaming services are available on Internet, such as online movie, online music, online radio and ….


Some employees will spend a lot of time searching and watching such materials at work time, even worse, they will download copies of copyrighted popular music and movies, sharing of these copies among strangers is illegal in most jurisdictions.


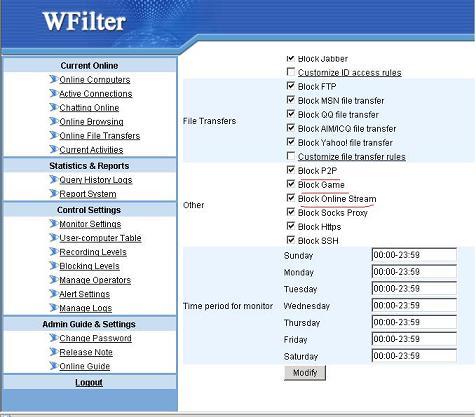
So it is important for organizations to block online streaming, block internet radioblock p2p traffic, monitor Internet access to guard against unauthorized share or leak and enhance efficiency use of enterprise resources.


Using WFilter to block internet radio and streaming


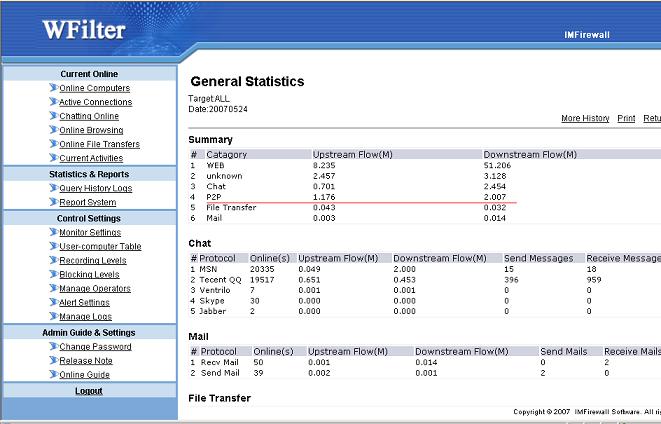
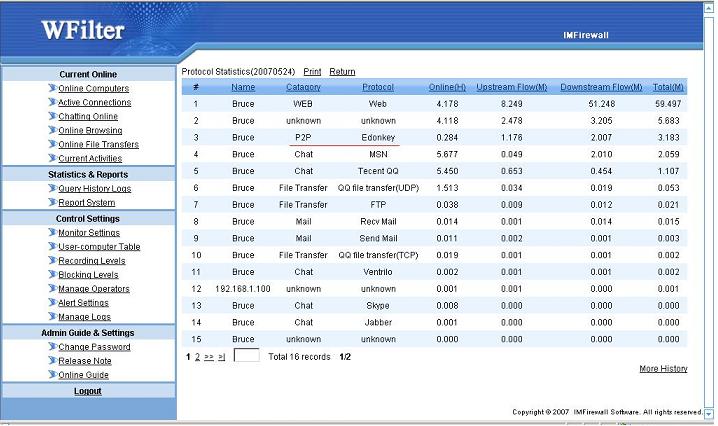
WFilter also has complete protocol reports for you.


You also can use WFilter to monitor chat, monitor email, block messenger, block p2p and implement an internet access policy.


Silently chat monitor using ARP Spoof

Silently monitoring using ARP Spoof


Most monitoring softwares require a broadcasted hub or a port mirror switch, or the monitoring program need to be installed at the proxy server.


If you don’t want to buy additional device and change your network topology, IMMonitor provides an arp-spoof tool to help you. However, we recommend you use a port mirror switch for long term use because arp-spoof will has some shortcomings:


Always do not spoof more than 30 computers and keep your computer stable. If your computer hangs or power off when spoofing, the computers being spoofed will lose connections.


Run ARP Spoof from IMMonitor


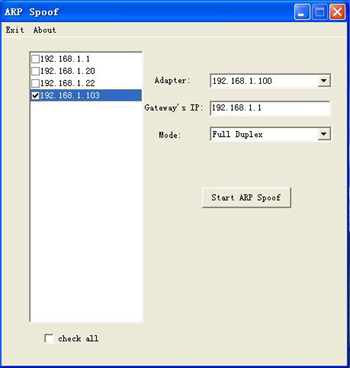
You need to restart your computer for the first time running arp-spoof. After restart, run arp-spoof again, choose your adaptor and set the mode to “Full duplex”, check the computers you want to spoof and click “Start ARP Spoof”.


Open IMMonitor console with ARPSpoof running, set “Mode” to “By IP Address” in “Monitor settings”. Then open “Online Computers” of IMMonitor, you will able to monitor other computers.


IMMonitor Features


Chat monitor: MSN chat monitor, AIM chat monitor, Yahoo chat monitor, ICQ chat monitor, QQ chat monitor, live messenger monitor.


Email Monitor: monitor emails, monitor email content, monitor company email, monitor pop3 email, monior smtp email, monitor incoming and outgoing emails.


Web surfing monitor.


Chat monitor using IMMonitor

Chat monitor using IMMonitor


It’s really important for companies to monitor employees instant messaging to prevent leaking of corporations business secret, and increase working productivity.


It’s also important for parents to monitor kids chat activities to protect them.


IMMonitor is designed to silently monitor chat content, monitor email transfer and web surfing activities in local network without installing any programs in client computers.


Here I give a short description of how to using IMMonitor to monitor chat in your network:


To install IMMonitor, please read How to install and deploy IMMonitor first.


Login into IMMonitor.


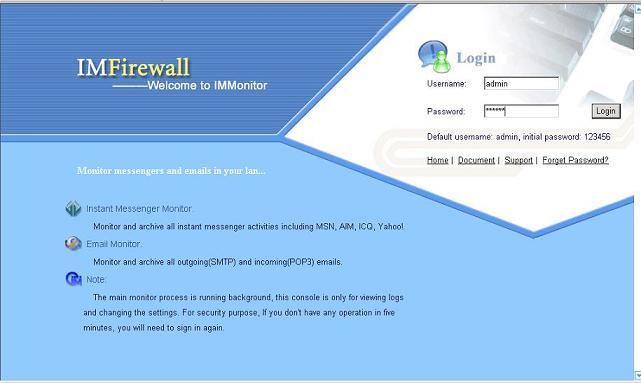
Login into IMMonitor using username admin, initial password 123456.


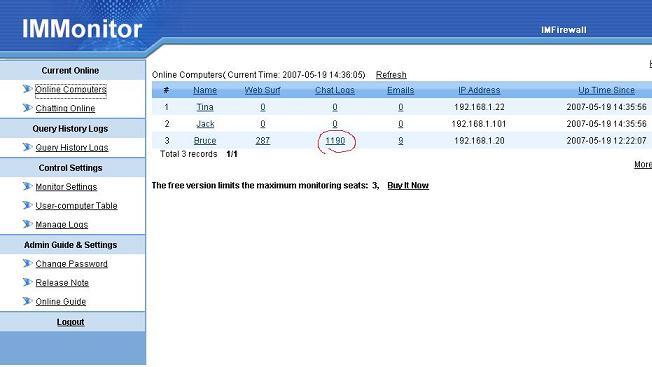
After login, you will be able to see all online computers detected. If you can not see other computers in your network. Your deployment of IMMonitor is possibly to be incorrect. Please check “How to deploy IMMonitor” chapter in “Getting started with IMMonitor”.


Online computers list:


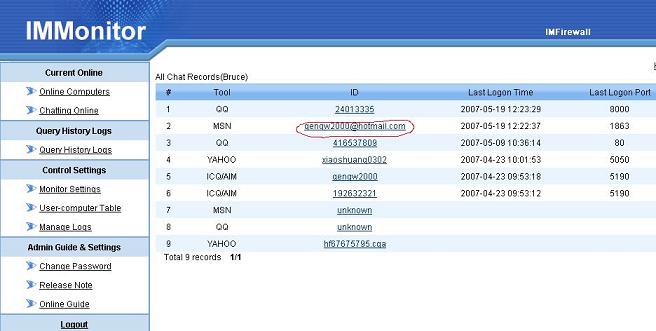
The figures under “Chat logs” will show monitored chat message number. Click the figure you will be able to see all messenger id which have been used in this computer.


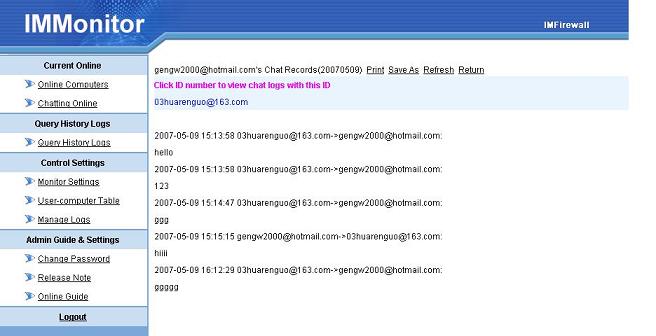
Click a messenger id and choose a date, you may see all chat history logs and chat content in that day of this id.


  Notice:


      Incorrect deployment of IMMonitor will no be able to monitor others computers, it is important to read “Gettting started with IMMonitor” first.