Category Archives: Uncategorized

How to block DropBox with WFilter free?

From version 1.0.172, WFilter free is able to block dropbox on network. In this guide, I will demonstrate you to block dropbox with WFilter free edition.

1.Download dropbox protocol

2.New a “block dropbox” policy

New a “block dropbox” policy in “Policy Settings”->”Blocking Level Settings”.

3.Define ip ranges to be blocked

Apply the “block utorrent” policy to client ip ranges in “User-device List”.

4.Check dropbox program and website

Can’t connect to dropbox server and website.

How to block utorrent downloading with WFilter 4.1?

From version 4.1, WFilter is able to block bittorrent traffic on network. Various bittorrent clients are supported, including utorrent. In this guide, I will demonstrate you to block utorrent downloading with WFilter 4.1, Web Filter Software.

Please Notice: in pass-by filtering mode, you need to block udp ports 1024-65534 in your router or firewall for complete blocking of utorrent.

Below are the steps to block utorrent in WFilter, if you haven’t deployed WFilter successfully, please check “WFilter Deployment Guide”.

1.New a “block utorrent” policy

New a “block utorrent” policy in “Policy Settings”->”Blocking Level Settings”.

Define ip ranges to be blocked.

Apply the “block utorrent” policy to client ip ranges in “User-device List”.

3.Now utorrent downloading is blocked.

Utorrent download speed will be zero when blocked.

In WFilter’s blocking history logs, you will be able to see blocking events of utorrent .

A simple deployment of WFilter with wireless router

Usually, a manageable switch or router with “port mirroring” feature is required for correct WFilter deployment. In case you only have a wireless router which does not support “port mirroring”, you can try this solution, which is simple to deployment.

The point is to “configure the WFilter PC as your internet gateway and turn the wireless router into a wireless AP.”

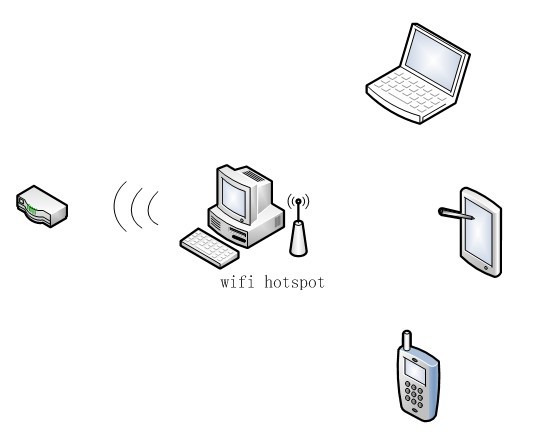
The network topology diagram:

1.Configure the WFilter PC as internet gateway

The first step is to make the WFilter PC acting as your internet gateway. The WFilter PC shall have two network adapters, one for internet access( usually connected to an ADSL modem), another one for local subnet(shall be configured as “obtain ip address automatically).

We use Win7 in this example. And you’re supposed to have setup internet connection in one network adapter.

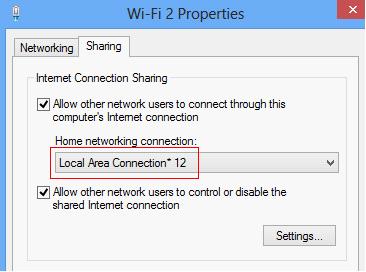
1.1 Sharing Internet to local subnet

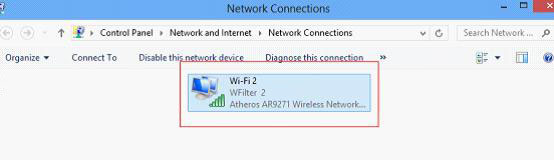
Click “Sharing” in “Properties” of the adapter which is connected to internet in “Control Panel”->“Network and Internet”->“Network Connections”, and choose “Allow other network users to connect through this computer’s internet connection”. (Figure1)

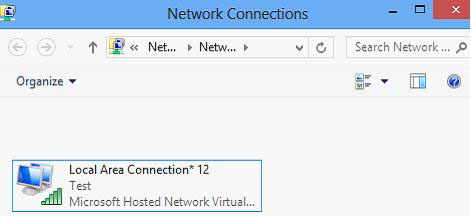
Now, another adapter(“LAN Connection”) will be assigned the ip address 192.168.137.1 (It will be 192.168.0.1 in windows XP).

This 192.168.137.1 is the default gateway for local subnet devices to access internet. To make it work for wireless devices, you also need to modify your wireless router’s settings.

2. Turn your wireless router into a wireless AP

Because the WFilter PC is sharing its internet, we only need the wireless router to act as a wireless AP.

Please leave the WAN interface dis-connected, and connect the “LAN Connection” adapter of the WFilter PC to a LAN interface of your wireless router(Can be every LAN interface, usually connect to LAN1).

2.1 Modify Lan interface ip address

Assign ip address “192.168.137.2” to the lan interface. If the WFilter computer is windows XP, the ip address shall be “192.168.0.2”.

2.2 Disable DHCP service

Because the WFilter PC is serving DHCP, now you need to turn off the dhcp service of the wireless router to avoid conflicting.

3.WFiler

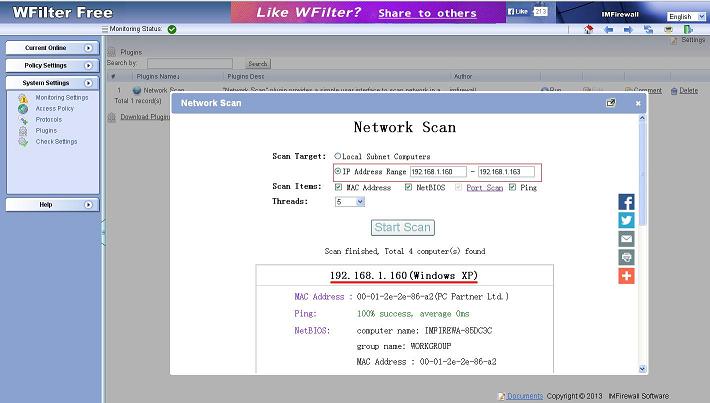
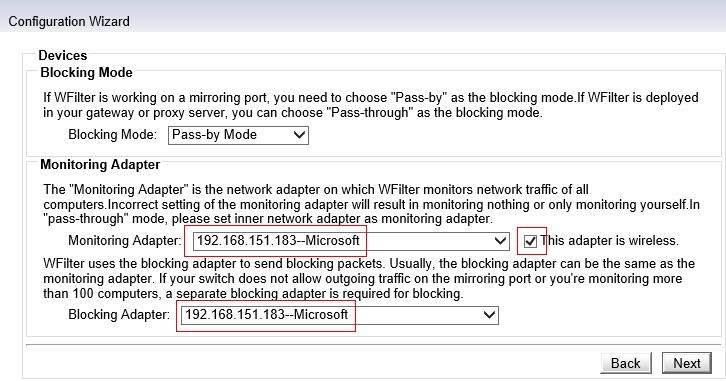
The last step is to configure the “LAN Connection” adapter as the monitoring adapter in “Monitoring Settings” of WFilter. And you’re able to monitor and filter local network users.

How to scan DHCP Server with WFilter free?

DHCP servers are commonly used for automatic ip address assigning of client devices. However, if there are multiple DHCP Servers available in one network unintended, it will lead to IP addresses confusion or conflict.

Using the “DHCP Discover” plugin of WFilter. You can get a list of running dhcp servers on your network by a single click.

In this example, I will guide you to use the “DHCP Discover” plugin of WFilter Free.

1.Install “DHCP Discover plugin”

Click “Download Plugins” in “System Settings”->”Plugins”. Find the “DHCP Discover plugin” and install it.

2.Launch this plugin to scan your DHCP Server

Firstly, You should choose an adapter and then “Start Scan”.

When the scan finished, you’ll get a list of running DHCP server(s) and certain informations.

How to scan network devices with WFilter free?

Using the “Network Scan” plugin of WFilter. Not only you can scan online list of devices, device type, os, IP and MAC address, you also can get a list of open ports of each device.

In this example, I will guide you to use the “Network Scan” plugin of WFilter Free

1. Install “Network Scan plugin”

Click “Download Plugins” in “System Settings”->”Plugins”. Find the “Network Scan plugin” and install it.

2.Launch this plugin to scan your network

2.1 Local Subnet Scan

You can choose “Local Subnet Computers” for a local subnet scan. The maximum “Threads” number is related to your hardware capability.

When the scan finished, you’ll get a full list of online devices, together with ip address, MAC address and manufacturer, os type, ping value, netbios and open ports. Andriod phone and iphone can also be detected.

2.2 Scan by ip range

You also can input ip address to scan a target ip range.

Turn your PC into a Wi-Fi HotSpot to deploy WFilter internet monitoring

This document decribes a new deployment of WFilter in a wireless network. The solution is to turn the wfilter computer into a wifi hotspot. So wfilter can monitor wifi clients using this hotspot.

Please notice: this solution uses the wireless adapter of the wfilter computer to share internet connections, its wifi signal might not be so strong as your wireless router.

1. Network Topology

2. Creating Wi-Fi HotSpot

Please check below steps to creating wi-fi hotspot in win8 enterprise. The detailed steps might be different in other windows versions.

1). This desktop has a wireless adapter.

2). Run “cmd” as Administrator. Enter the following command:

netsh wlan set hostednetwork mode=allow ssid=Test key=password

This command in below figure will create a wireless access-point with SSID of “Test” , key of “12345678″. You can modify the “ssid” and “key” as you want.

3). Run the following command to start wifi hotspot.

netsh wlan start hostednetwork

4). Now you will see a new microsoft hosted network virtual adapter.

5). Open your wifi’s property to enable internet connection sharing to the virtual adapter.

Now you shall be able to see the new wifi hotspot in mobile devices. Clients using this hotspot can be monitored by wfilter.

There are several other ways to create a wifi hotspot, you may do it in a way you like.

3. Setup WFilter

1). Run “Configuration Wizard” in “Help” of WFilter

2). Choose “pass-by mode”, set the wireless adapter as the “monitoring adapter” and “blocking adapter”, check “this adapter is wireless”.

3). Next until finish. Now you’re able to monitor connected wifi clients.

How to submit support file of WFilter?

Due to complicated settings and network topology, it’s not easy to describe a question of WFilter.

For us to understand your question easier, we recommend you to use the “support” feature of WFilter to submit your support request. The “support” feature will gather required settings and network packets samples for diagnose purpose. So we can locate the problem quickly.

It’s simple to submit a support request. In most case, you only need to describe your question and click “submit”. (Figure 1)

In case when your question is related to a certain behavior(for example, email sending is not recorded), we will need a packet dump of this behavior.

You need to check “Add packet dump file(s)”, and click “Restart Capturing” for WFilter to start packet capturing. (Figure 2)

The default packet dump captures packets of all client computers. To make it simple, you’re recommended to capture packets for the testing client computer only. (Figure 3)

We will reply you by email when we get your support request.

How to block “Ammyy Admin” in network?

This tutorial will guide you to block “Ammyy” with “WFilter Enterprise 4.0″.

First, Add “Ammyy” Protocol.

Ammyy has one pattern:
“ammyy_tcp”:
  Type — “TCP SEND”
  Format — “0″
  Content — “^\x25[\x00-\xff]{4}\x2e\xf4\xff\xff”

Second, Enable blocking of Ammyy in certain blocking levels.

And apply this blocking policy to certain computers.

Now, Ammyy will be blocked.

WFilter blocking events:

Failure connection of Ammyy.

Related Links:

http://blog.wfilterngf.com/How+To+Block+TeamViewer+On+My+Network+Using+WFilter.aspx

How to block hotspot shield in network?

Hotspot Shield is a free vpn service for you to access blocked websites. With hotspot shield, you can bypass internet filter on your network.

So, to implement internet access policies in business networks, it is required to block hotspot shield traffic.

This tutorial will guide you to block hotspot shield with WFilter.

Add hotspot shield protocol

Because “hotspot shield” is not a default protocol of WFilter, you need to define it manually in “Customize Protocols”.

As in the above figure, add a new protocol named “HotSpot” in “Customize Protocols”. Three patterns are required:

UDP send pattern 1: “^\x88[\x00-\xff]{8}(\x00){5}$”

UDP send pattern 2: “^\x28[\x00-\xff]{9}(\x00){4}”

TCP send pattern: “\x00\x0e\x88[\x00-\xff]{8}(\x00){5}$”

Enable blocking of “hotspot shield”

Now, by enabling “Block hotspot” in blocking level settings, hotspot will be blocked.


Please notice:

Hotspot can be completely blocked when your WFilter is deployed in “pass-through” mode. However, in “pass-by” mode, for complete blocking of hotspot, you also need to block udp ports 900-65534 in your router or firewall. check: How to block certain UDP ports in router/firewall?