1. What is network tap?
Network tap is also a good way to monitor network traffic. Comparing to “port mirroring” switch, it has several advantages:
- Handy and flexible, requires no power supply.
- Once a network tap is in place, the network can be monitored without interfering with the network itself.
- Low cost, you even can dry it by yourself.
Guide to make a network tap can be found at below links:
- Throwing Star LAN Tap
- Building an Ethernet Tap
- Throwing Star LAN Tap
- Create a passive network tap for your home network
The disadvantages of network tap:
- Can not monitor gigabit networks. Requires “filterable tap”.
- The monitoring port does not allow outgoing traffic. Therefore you need three network cards in the monitoring computer, two for monitoring, another for communication.
This blog will guide you to deploy WFilter with “Throwing Star LAN Tap”.
2. Deploy the LAN Tap.
First, you need to attach three network cards in the monitoring computer.

In this example, this lan tap is connected between the router and first switch(J1 and J2). Monitoring ports J3 and J4 are connected to two adapters of the monitoring computer.
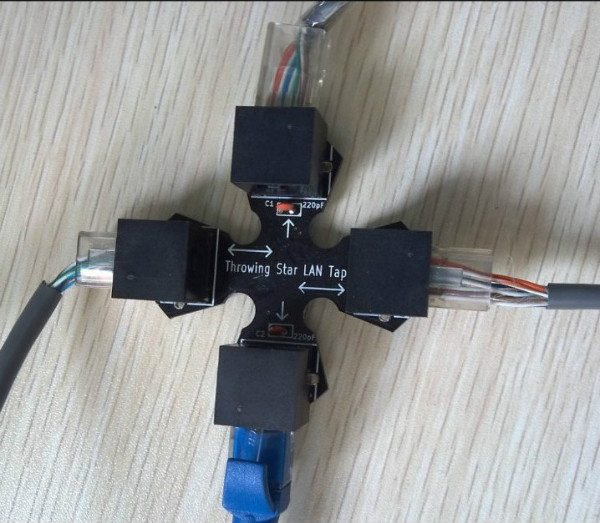
Actually it does not require ip address for the monitoring adapters. In this example, we assign “192.168.1.181″, “192.168.1.182″ to the two monitoring adapters(Assigning an ip address makes it easier for us to identify the adapter in WFilter). The third adapter is assigned with “192.168.2.189″.

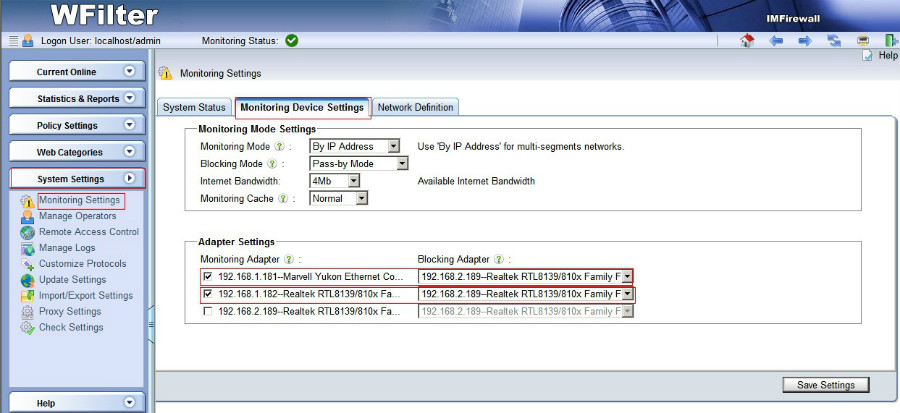
3. Setup WFilter
Check the two monitoring adapters in “System Settings”->”Monitoring Settings”. The blocking adapter shall be choosed as the third adapter for sending blocking packets.
Now we’re able to monitor client computers. You will notice that one monitoring adapter only get incoming packets, while another adapter only get outgoing packets. This is how network tap is designed.
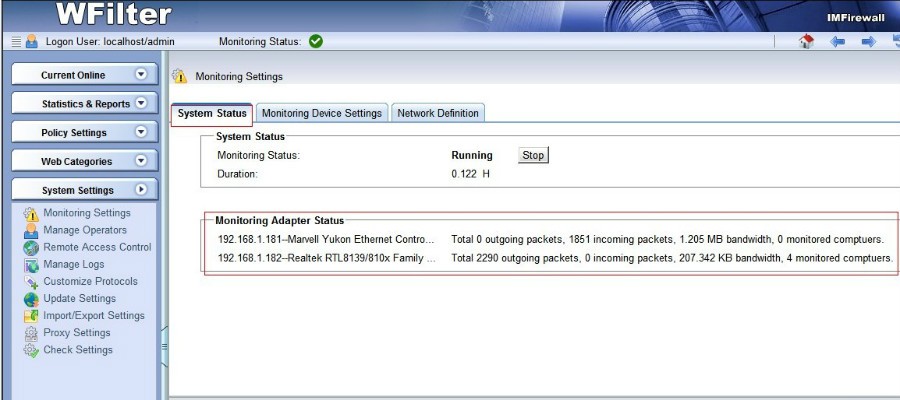
Client computers also can be blocked.