Category Archives: Uncategorized

How to uninstall WFilter?

This tutorial will demonstrator you the steps to uninstall WFilter.

1. Click the “Uninstall WFilter” shortcut

Click the “Uninstall WFilter” shortcut in windows programs list.

2. Confirm un-installation

3. Un-installation Success.

Wait until end of the un-installation.

How to block “Online Games” in WFilter 4.1?

This article introduce you to block “Online Games” in WFilter 4.1 .

1. New a blocking level in “Policy Settings->Blocking Levels”, enable ‘Block webpages by categories’ and click ‘New’:

2. Edit Webpage Category Policy :

3. Apply this blocking level to computer:

4. Check result(e.g http://www.4399.com):

And you can check blocking record in ‘Current Online-Realtime Blocking’.

How to block “Proxy Tunneling” software in WFilter 4.1?

This article introduce you to block “Proxy Tunneling” software in WFilter 4.1 . Tor is a popular Proxy Tunneling software, and I will guide you to block Tor.

Step 1. New a blocking level in “Policy Settings->Blocking Levels”, click “Edit” in Applications tab:

Step 2. Deny tor protocol and save setting:

Step 3. Apply this blocking level to computer:

Step 4. Open tor then it can’t connect to the server.

Step 5. You can see blocking records in “Current Online->Real-time Blocking”:

How to block snapchat in network?

Snapcaht is a popular chat software, this article will guide you to block snapchat in WFilter 4.1 .

Step 1. New a blocking level in “Policy Settings->Blocking Levels”, click “Edit” in Applications tab:

Step 2. Deny snapchat protocol and save setting:

Step 3. Apply this blocking level to computer:

Step 4. Visit snapchat website and check result:


Step 5. You can see blocking records in “Current Online->Real-time Blocking”:

How to block video by protocols in WFilter 4.1?

WFilter 4.1 has it’s own protocols library, so you can block protocols to block video website and client.

Step 1. New a blocking level in “Policy Settings->Blocking Levels”, then click “Edit” in Applications tab:

Step 2. Deny all protocols in Streaming category:

Step 3. Apply this blocking level to computer:

Step 4. Visit video website and check result(Youtube client also be blocked):

Step 5. You can see blocking records in “Current Online->Real-time Blocking”:

How to block video files with WFilter 4.1?

WFilter can detect type of transfer files, when you block web video, all video files will be blocked by WFilter.

Step 1. New a blocking level in “Policy Settings->Blocking Levels”, and check “Block Web Video” in Web tab:

Step 2. Apply this blocking level to computer:

Step 3. Visit video website and check result:

Step 4. You can see blocking records in “Current Online->Real-time Blocking”:

How to block video websites with WFIlter 4.1?

WFilter 4.1 has a url library so you can block “Streaming Media” category to block video websites.Proceed as follows:

Step 1. New a “blocking level” in “Policy Settings->Blocking Levels”, then check “Block webpages by categories” and select new in “Category”:

Step 2. Deny “Streaming Media” category and save setting:

Step 3. Apply this blocking level to computer in “Policy Settings->User-device List”:

Step 4. Visit a video website and check result:

Step 5. You can see the blocking records in “Current Online->Real-time Blocking”:

How to activate WFilter 4.1?

WFilter supports online activation and Email activation.

If you choose to activate your product over the Internet, upon your submisson the activation wizard will detect your Internet connection and connect to a secure server to transfer your register key to us. The registration is passed back to you, automatically activating WFilter, if the register key is valid.

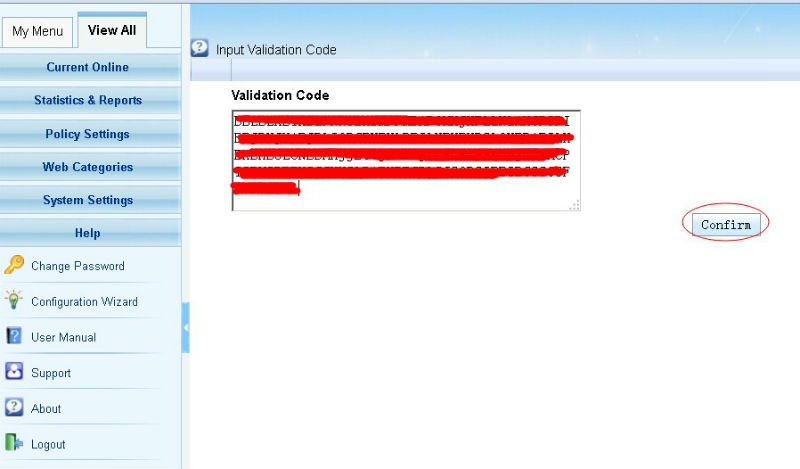
If you choose to activate your product by email activation, you should input the register key in text box and click the “confirm”. You will get an activation code. Please send them to the support email box. The validation code will be sent back to you within 24 hours. Please copy them in the valiation code textbox to activate your product.

1. Steps of Online Activation

Online activation requires an available internet connection to connect to WFilter activation server.

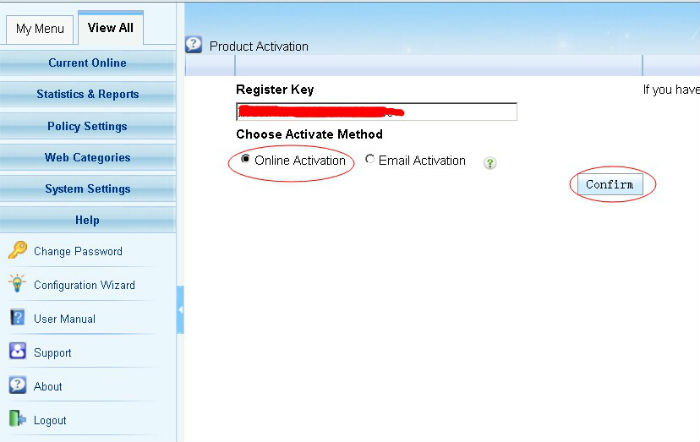
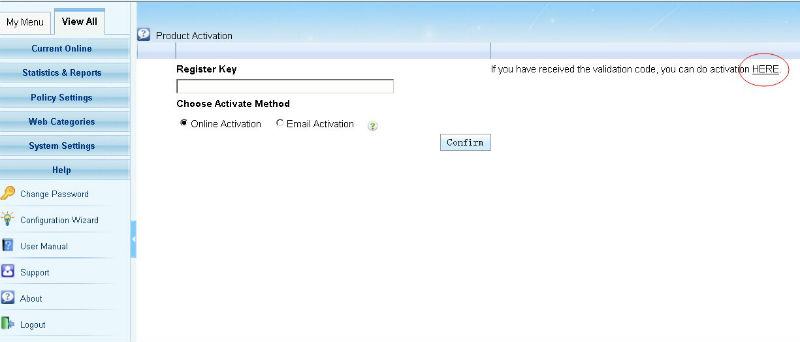
1). In “Help”->”About” of WFilter, click “Product Activation”.

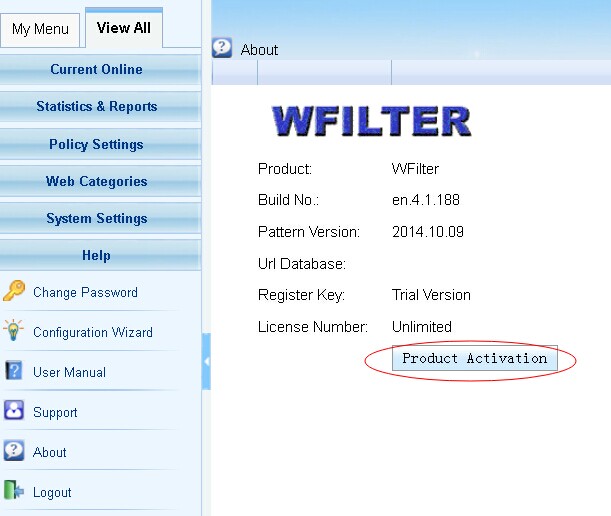
2). Input your key number and use “online activation” to do online activation.

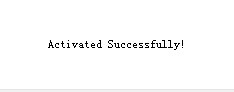
3). Successful activation.


2. Steps of Email Activation

Online activation requires an available internet connection. If you can not connect to WFilter activation server, you also can use “Email Activation”.

1). Input your key number and use “email activation” to do online activation.

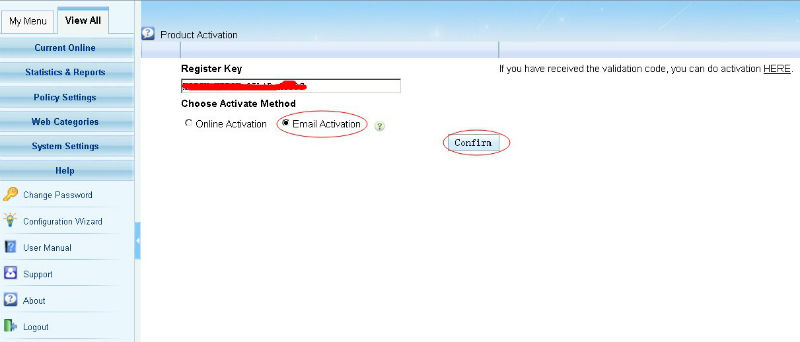
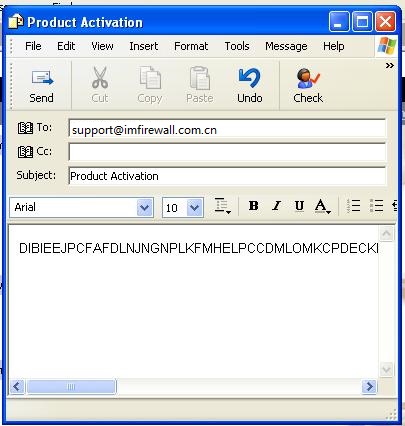
2). In “Email Activation”, copy the activation code and send to support email address support@imfirewall.com.cn.

active12_2 wfilter_activate_email3_2


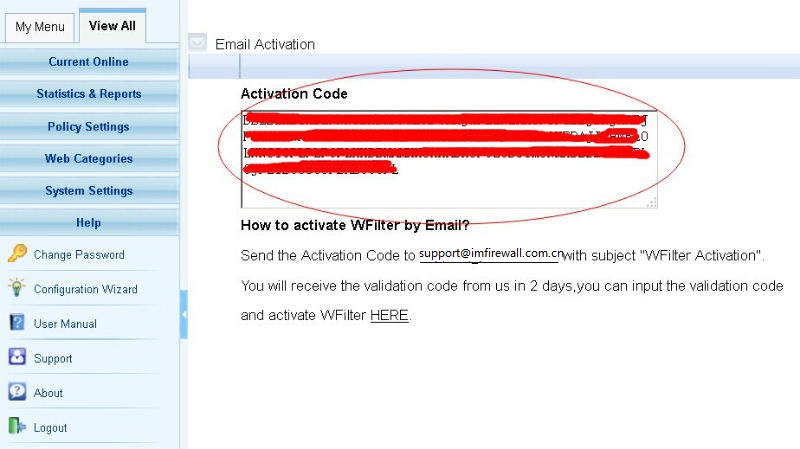
3) It might take several hours to receive the reply email since the response email is sent manually.

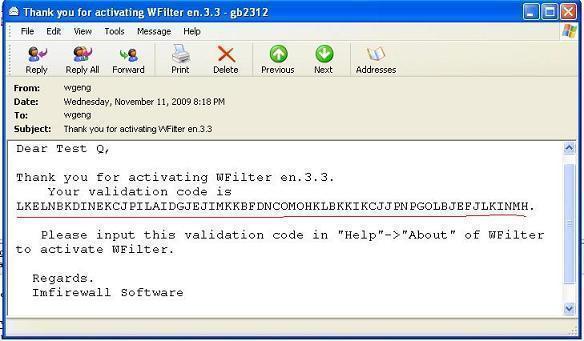
4). In “Help”->”About” of WFilter, you need to enter the received validation code into WFilter.

3. Website Activation

You also can do activation on our website at here: http://www.wfiltericf.com/activation/
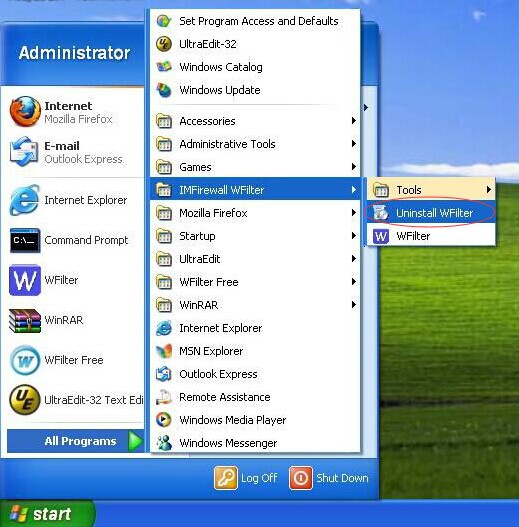
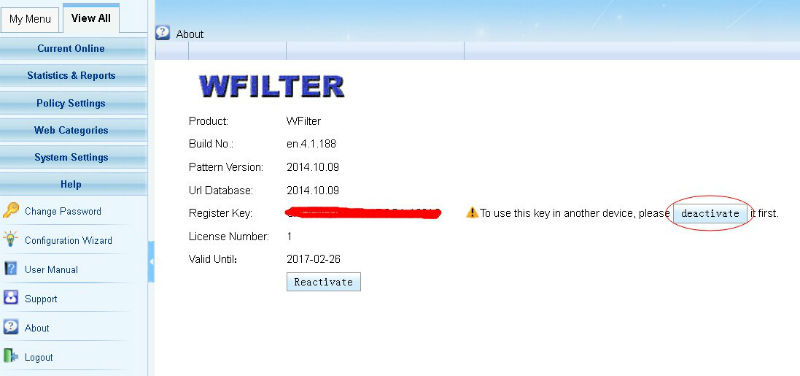
4. De-activation

Sometimes, you might want to move the key to another computer. You need to de-activate this key first.
Click “deactivate” in “Help”->”About” to de-activate the key.

How to customize scheduled reports in WFilter?

In WFilter 4.1, you can customize the email format for WFilter standard reports. With this feature, you can customize the emails sent to users.

For example, if you want a client to receive a monthly email of total bandwidth consumed, you can enable this feature. The email will look like being sent from you. Check below steps:

Edit a standard report

Edit a standard report, choose “Report Format” as “Customize”.


Customize the email content

Just input the email content, you can use the replacing marks listed. Html syntax is supported.

Now you can click “Send” and check your email. It’s exact what you’ve typed in.

How to detect network devices which are running NAT services or proxy services with WFilter?

Using WFilter’s “NAT Detector” plugin, you can detect client devices which are running NAT services or proxy services.

In this example, I will guide you to use the “NAT Detector” plugin of WFilter.

1. Install “NAT Detector” plugin.

2. Detect client devices which are running NAT services or proxy services.

Devices running NAT/proxy services will be listed, together with the client devices.

3. Set temporary blocking

You can set temporary blocking for punishment